Bootstrap Checkbox Input
Introduction
In certain cases the easiest features might just become really vital-- especially each time you get to need them. For example exactly how do your site visitors connect with the pages you make stating a simple Boolean act-- simply yes or no referring to a number of the questions you want to request, precisely how they do agree to the terms or perhaps line up a handful of the attainable options they might have. We commonly get past this with no paying very much of an care to the feature accountable for these sorts of actions yet the Bootstrap Checkbox Toggle is certainly a really important feature-- one our forms can't actually perform without.
In the most updated fourth edition of the Bootstrap framework we are supplied with the
.form-check.form-check-label<div>.form-check.form-check-label<label><input>.form-check-inputHow you can make use of the Bootstrap checkbox:
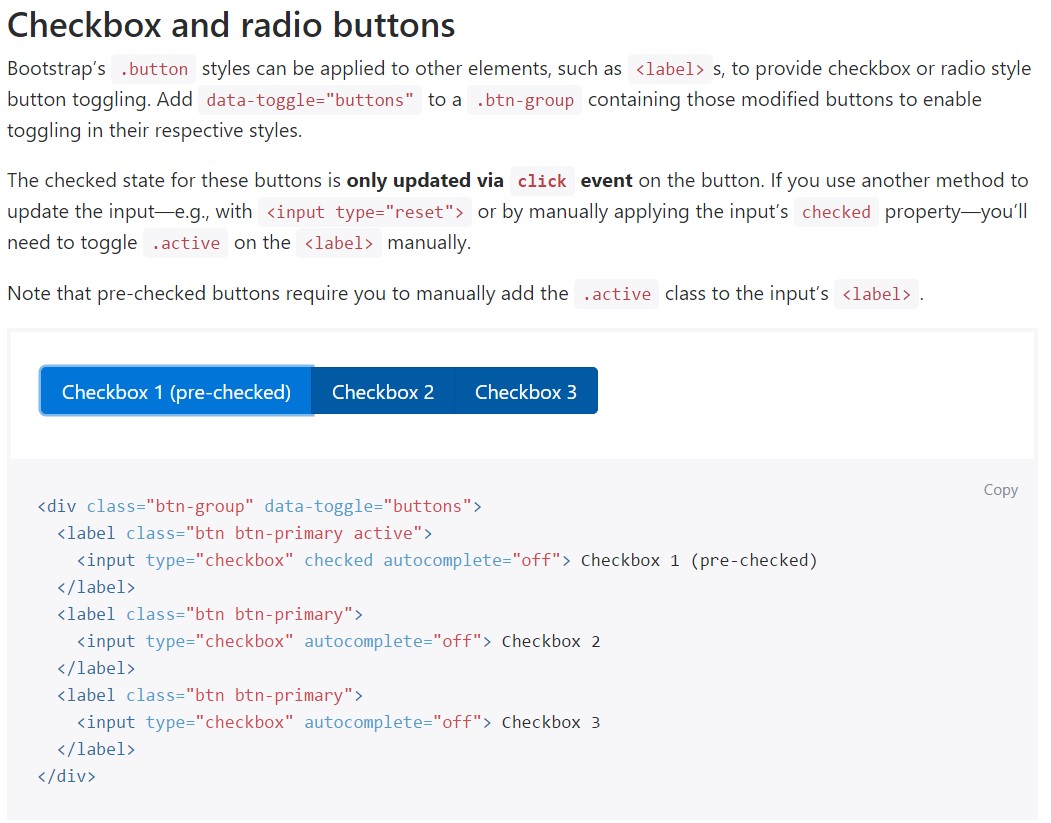
Bootstrap's
.button<label>data-toggle=" buttons".btn-group
<div class="btn-group" data-toggle="buttons">
  <label class="btn btn-primary active">
    <input type="checkbox" checked autocomplete="off"> Checkbox 1 (pre-checked)
  </label>
  <label class="btn btn-primary">
    <input type="checkbox" autocomplete="off"> Checkbox 2
  </label>
  <label class="btn btn-primary">
    <input type="checkbox" autocomplete="off"> Checkbox 3
  </label>
</div>
From time to time we need to have the checkboxes to come in our forms without the customer actually having the capacity to take some practice clicking them-- that is definitely where the disabled option comes in.
Just to disable efficiently a checkbox in Bootstrap 4 applying the common HTML attribute
disabledIn case that you like the suggestion and simply want to carry this out you must assign the
.disabled.form-checkA different situation
Any time you are using checkboxes, wrap all of them in a
<label>.custom-control.custom-checkboxUtilize
.custom-control-input<input>Also utilize two
<span>.custom-control-indicator.custom-control-description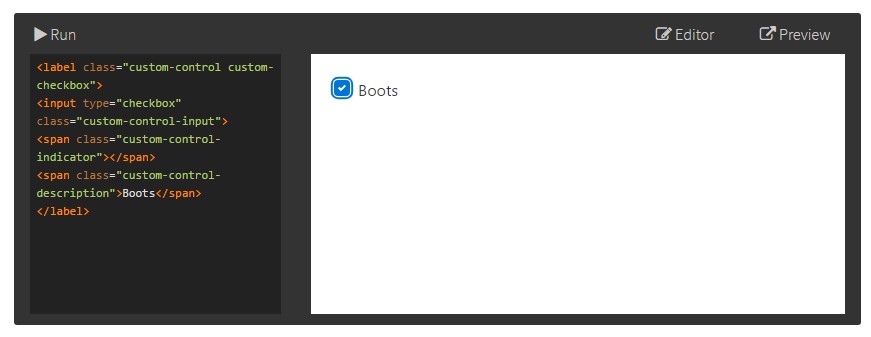
<label class="custom-control custom-checkbox">
<input type="checkbox" class="custom-control-input">
<span class="custom-control-indicator"></span>
<span class="custom-control-description">Boots</span>
</label>
Bootstrap Checkbox Toggle forms
Default radios and checkboxes are upgraded upon with the aid of
.form-checkDisabled checkboxes and radios are supported, but to give a
not-allowed<label>.disabled.form-checkA fresh stuff for the Bootstrap version 4 framework is the initiation of the so called custom form elements. These are actually the very same elements we are knowing inside practicality but styled much more appealing and also with the Bootstrap method. By using them you may put in some spice and style to your web content by simply simply just appointing a couple of additional classes to the commands you involve in your forms.
In order to work with custom made checkboxes wrap them in a
<label>.custom-control.custom-checkbox<input>.custom-control-input<span>.custom-control-indicator.custom-control-descriptionConclusions
That's pretty much everything you should work on in order to set a checkbox feature inside your Bootstrap 4 powered site and put in certain customized flavor to it putting in it a beautiful appeals. Right now everything you have to do is repeat the exercise before you have actually inspected all the checkboxes required are already on the page.
Check a few youtube video training about Bootstrap checkbox
Related topics:
Bootstrap checkbox approved documents
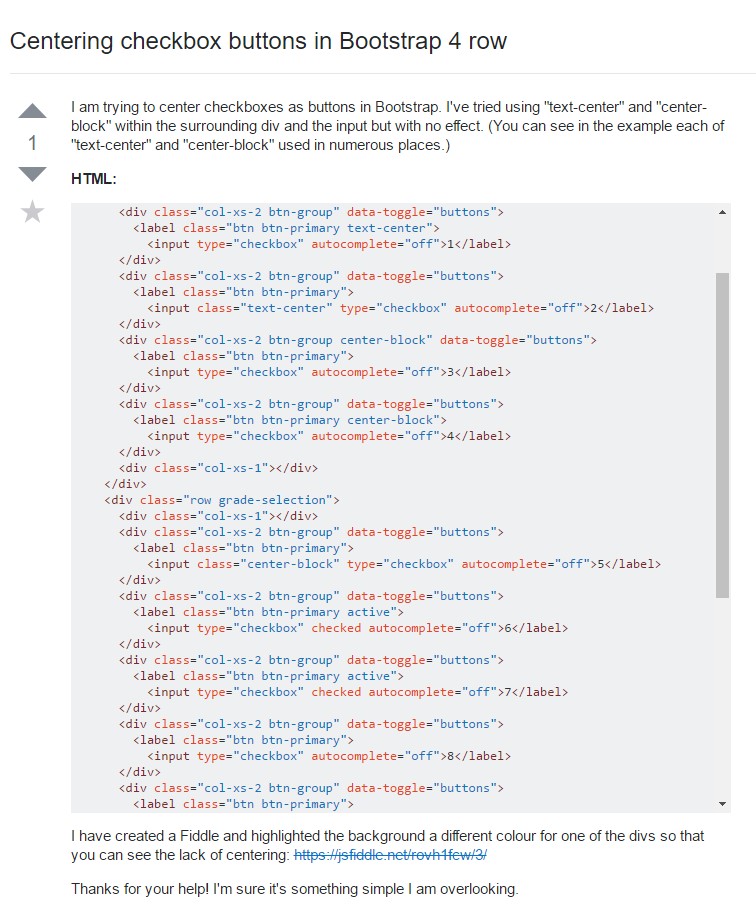
Centering checkbox buttons in Bootstrap 4 row
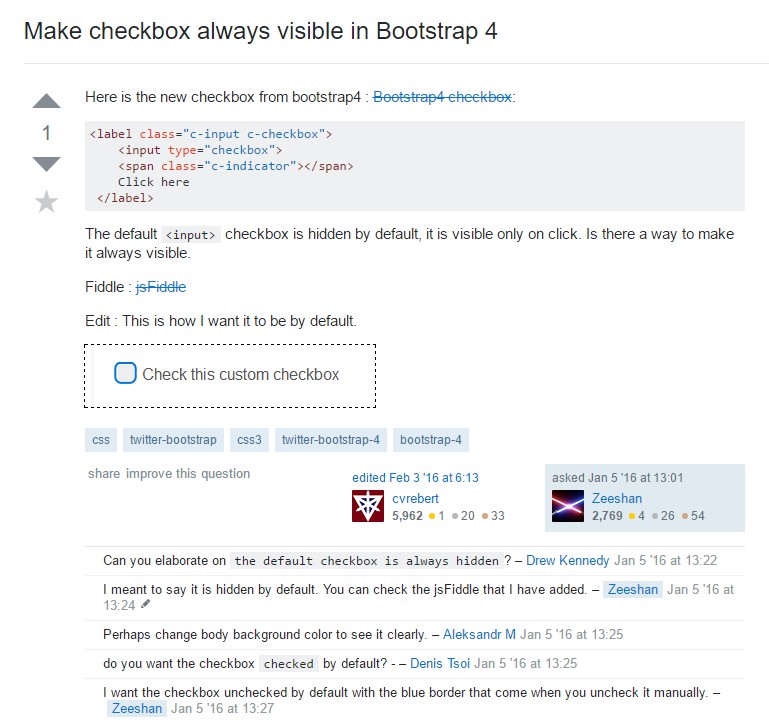
Make checkbox always visible in Bootstrap 4